This is a simple Projection Mapping tutorial for beginners. You will use a Processing sketch to map your face (or an image file face) onto a mannequin face. The Processing sketch will record your face through your webcam, or will read an image file from your disk. The Processing Sketch output is then passed via Syphon (or Spout) to the VJ software Resolume Arena, and then you will use Resolume worping features to map your face onto the mannequin.
Download the software
Separate files
- Download & install Processing (processing.org)
- Download and Install Resolume Arena (resolume.com)
- Windows users: download Spout (spout.zeal.com)
- OSX users: download Syphon Simple Server/Client (syphon.v002.info)
Install Video Library for Processing (OSX & Windows users)
In order to use our webcam with Processing, we need to install the correct library. To do so, go to:
Sketch > Import a library > AddLibrary...
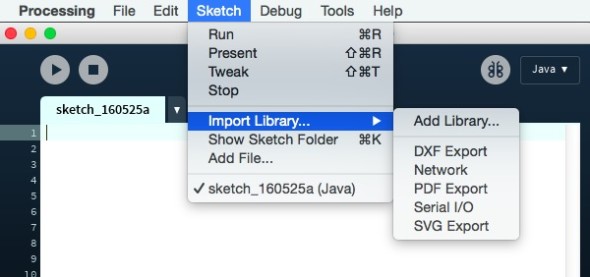
and type Video in the ‘Find’ field. Click on the Video library from Processing foundation:
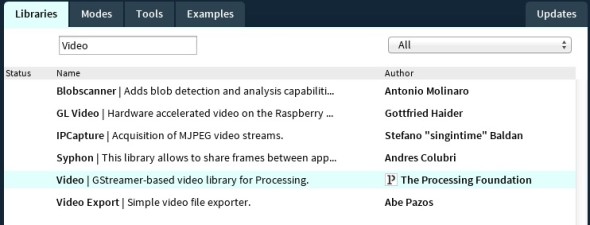
Click ‘Install’ button and wait for the download. If the installation will success, you should see a green circle at the beginning of the row.
Install SPOUT (Windows users)
We need to install SPOUT service both for Resolume and for Processing.
- To install SPOUT for Resolume, just copy .dll files from
C:\ProgramFiles(x86)\SpoutX\FFGL
to
C:\Program Files (x86)\Resolume Arena X\plugins\vfxDownload Spout
- For Processing, we need to install the Spout library. Just Repeat the step you did to install the Video library, but this time installing ‘Spout’ library

Install SYPHON (OSX users)
We need to install Syphon both for Resolume and for Processing.
- To install Syphon for Resolume, […]
- For Processing, we need to install the Syphon library. Just Repeat the step you did to install the Video library, but this time we will search for the ‘Syphon’ library

Run the Processing sketch
- Download here (WIN, MAC) the processing sketch for the exercise. You need to have a connected webcam and a projector to follow the entire exercise.
- Run the sketch. Use 1, 2, 3 keys to switch between 3 modes:
- A men faces selection
- A women faces selection
- The livestream from the webcam. Press spacebar to freeze the stream. It will facilitate the mapping of your static face.
- From now on, the Processing sketch will stream via Spout (Syphon) its output to every Spout (Syphon) receivers. We’ll use Resolume Arena Spout (Syphon) receiver plugin to catch this stream and map it onto our mannequins.
- Open Resolume.
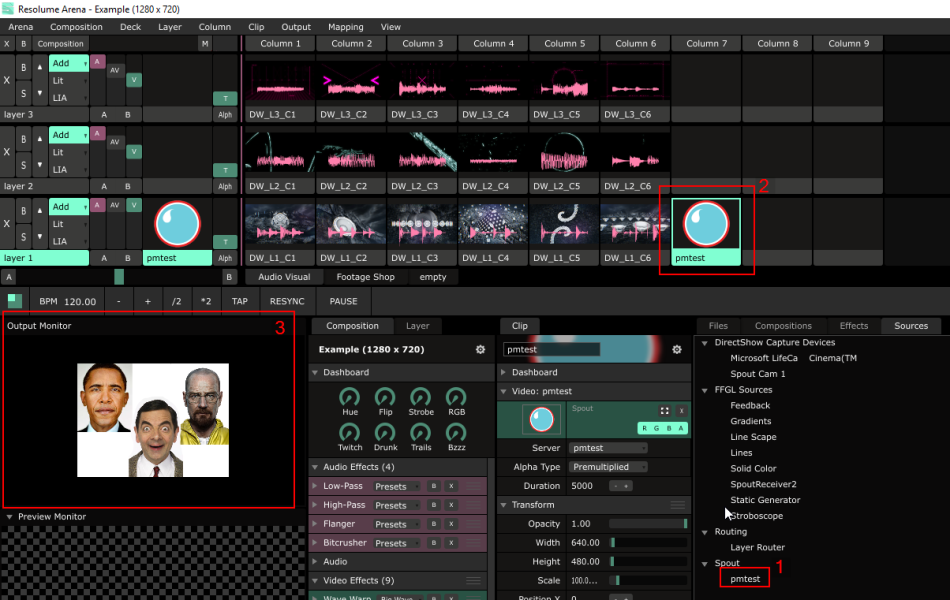
- Under The tab Sources you should see a Spout (Syphon) branch: it is the output of our Processing sketch. Drag and drop the pmtest (It might have a different name from this example) label from the Source tab into one of the empty console boxes (2).
- Click on the pmtest console box you just created: you should see the Processing sketch output into the Output Monitor area (3)!
Let’s map your face!
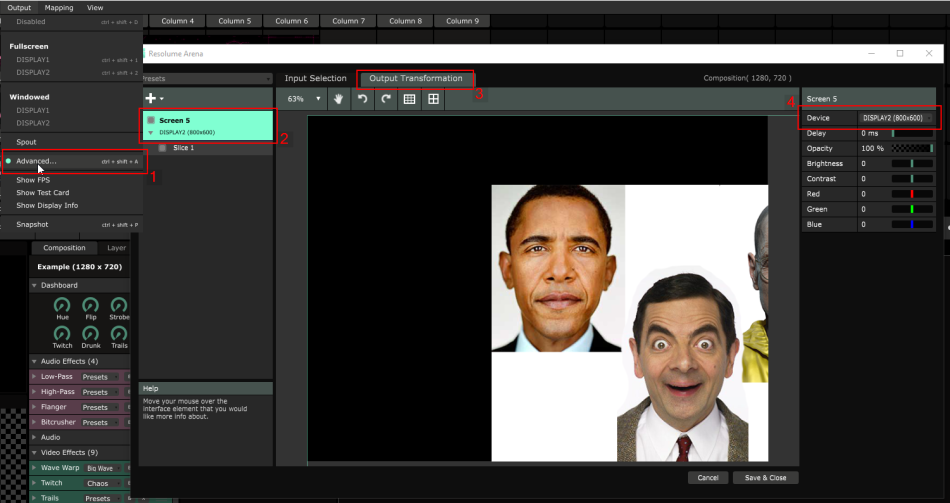
- Open the Advanced Output Menu from the menu Output/Advanced (1).
- Make sure The Screen Label (2) and the Output Transformation tab (3) are selected. In the Device Menu (4), choose the display of your projector. After that, you should see the Output Transformation tab content projected by your projector.
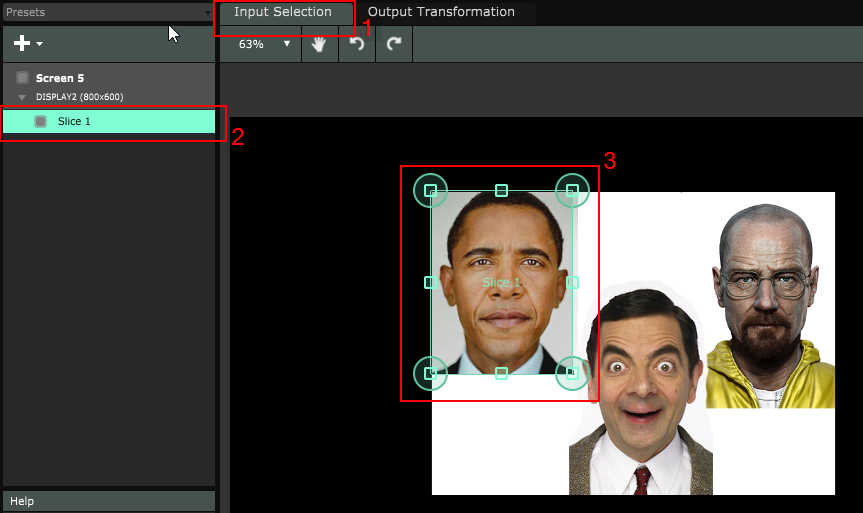
- Since we want to project only one face, there is no need to project the whole source processing composition onto our mannequin. Let’s select only a cropped area. Select the Input Selection tab (1) and make sure the Slice 1 label is selected (2). Now drag and drop the four corners of the highlighted area around the face you want to project (3). Now we have
- Back to the Output Transformation tab (1), richgt click on the image and select Match Input Shape (2). Now that we have a more proportioned figure, Select the Transform tool (3) and drag the figure in place, to roughly match the mannequin face.

- Now the fun part. Choose The Edit Point tool (1) and start to subdivide the figure surface adding some movable vertices: click on ‘+’ Subdivisions X/Y until you are satisfied. These vertices added to our figure allows us to move only specific portion of the face texture, to refine the mapping and warp the image to perfectly align the face in the figure to the mannequin one. For example, if you want to move the entire right eye, you should select the area highlighted with the number (3) (by dragging the left mouse button). Once the vertices are selected, you can move them altogether.
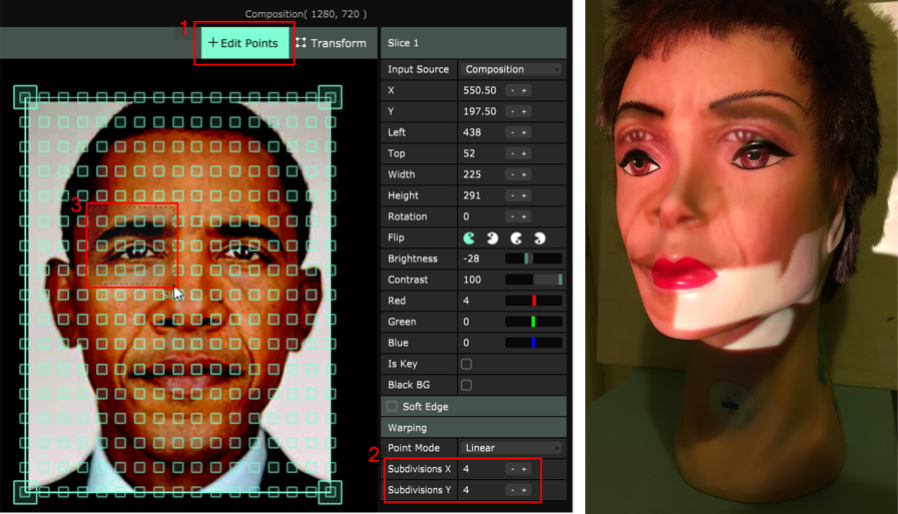
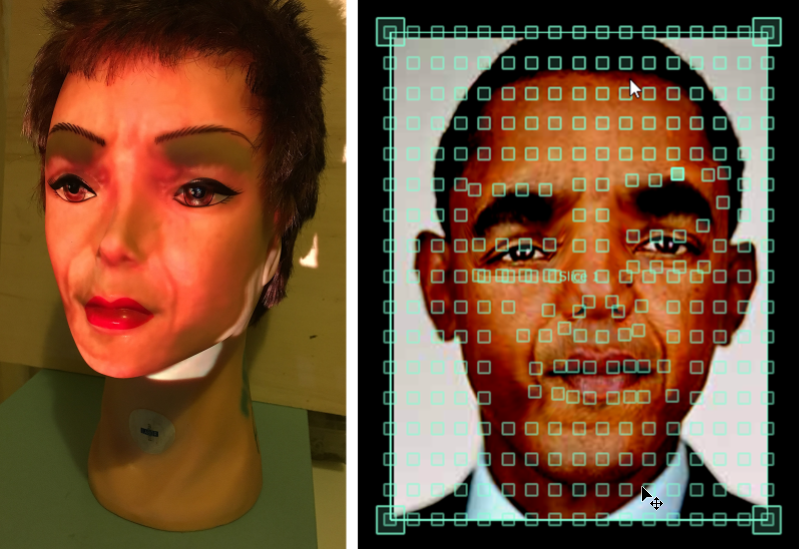
- Repeat the previous step until you get the desired result. In the following images you can see the final result (still very rough, no time to map 🙂 and the resulting warped image.